

Part of our complete guide: 8 Best Gaming Keyboards in 2026
Disclosure: Gaming Shopee is reader-supported. When you buy through links on this page, we may earn an affiliate commission at no extra cost to you. We only recommend products we’ve researched and would use ourselves.
Crumbs, skin oils, and dust settle into a mechanical keyboard faster than most people realize, and left long enough, that buildup starts affecting how switches actually feel and register keystrokes. A proper deep clean takes under an hour, requires no special expertise, and genuinely extends how long a keyboard performs like new.
What You’ll Need
| Tool | Purpose | Typical Price |
|---|---|---|
| Keycap puller (wire or plastic) | Safely removes keycaps without damaging switch stems | ~$5-10 |
| Isopropyl alcohol (90%+) | Cleans switch housings, stems, and PCB contact points | ~$5-8 |
| Soft-bristle brush | Dislodges debris from switch housings and stabilizers | ~$5-10 |
| Electric air duster or squeeze bulb | Blows loose dust and crumbs out without canned-air propellant risk | ~$20-40 |
| Microfiber cloth | Dries keycaps and wipes down the case without scratching | ~$5-10 |
| Cleaning gel (optional) | Lifts dust from crevices and around switch stems without liquid | ~$8-12 |
Step 1: Unplug the Keyboard First
This is the single most important safety step and the easiest one to accidentally skip: always unplug a wired keyboard or power off a wireless one before starting any cleaning process, since introducing moisture or alcohol to a powered board risks shorting the PCB in a way that’s often unrecoverable. For wireless keyboards, removing the battery entirely (if it’s user-removable) is an extra layer of safety worth taking during a deep clean specifically, rather than just switching the board off.
Step 2: Photograph Your Layout Before Removing Keycaps
Before pulling a single keycap, take a clear overhead photo of your keyboard’s current layout, especially if you’re using anything other than a completely standard ANSI layout or have custom keycaps in non-standard positions. This single step avoids the genuinely common mistake of finishing a clean only to realize you can’t remember exactly which row a specific modifier or arrow key keycap came from, particularly on boards with sculpted keycap profiles where row-specific caps aren’t interchangeable.
Step 3: Remove Keycaps With a Proper Puller
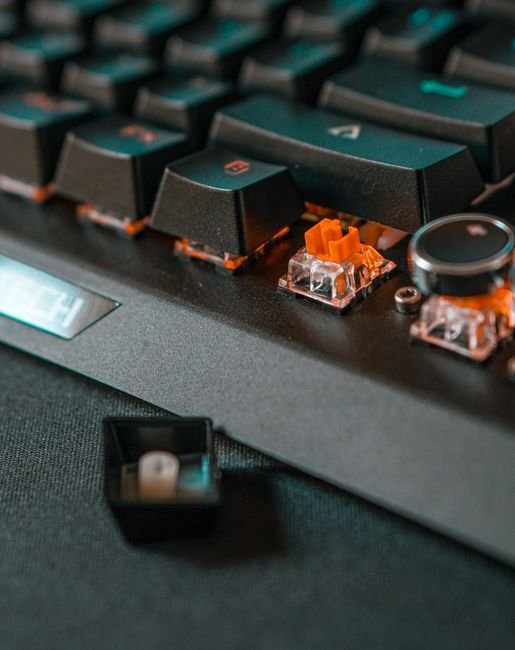
Using a wire keycap puller rather than your fingers or a flathead screwdriver meaningfully reduces the risk of damaging switch stems or scratching keycap legends during removal. Position the wire loops under a keycap so they catch the corners evenly, then pull straight upward with steady, even pressure — pulling at an angle is the most common way to flex or crack a switch stem during this step, so resist the urge to rock a stuck keycap side to side and instead apply firm, vertical pressure. Larger keys with stabilizers, like the spacebar and shift keys, need a bit more care since they’re anchored at multiple points; gently rocking these specifically (rather than smaller single-stem keys) while pulling helps release them without bending the stabilizer wire underneath.
Step 4: Soak Keycaps in Warm Soapy Water
Drop all removed keycaps into a bowl of warm water with a small amount of mild dish soap, and let them soak for 30 to 60 minutes to loosen the accumulated skin oils and grime that build up on every keycap over months of regular typing. After soaking, gently scrub each cap individually with your fingers or a soft-bristle brush, paying particular attention to the underside and stem cavity where oil and dust tend to concentrate most. Rinse thoroughly with clean water afterward to remove any leftover soap residue, since dried soap film can leave keycaps feeling slightly tacky once reassembled.
Step 5: Let Keycaps Dry Completely Before Reassembly
This step gets rushed more often than any other in the entire process, and it’s genuinely important not to skip: keycaps need to air dry completely, ideally overnight on a clean towel, before going back onto the switches, since trapped moisture inside a keycap cavity can eventually work its way down into the switch itself. Patting caps dry with a microfiber cloth speeds this up somewhat, but doesn’t replace a full air-dry period — resist the temptation to reassemble a still-damp keyboard just to get back to using it sooner.
Step 6: Clean the Switches and Base With Isopropyl Alcohol
With keycaps off, use an electric air duster or squeeze bulb first to blow out loose dust and crumbs sitting between and around the switches, then dampen a cotton swab with 90%+ isopropyl alcohol to clean the exposed switch housings, stems, and surrounding PCB area. Focus specifically on the switch stem and the top housing opening where oils and dust accumulate most, using light pressure rather than saturating the swab, since excess liquid dripping down into the switch housing is exactly what you’re trying to avoid by using a barely-damp swab rather than a soaked one. Isopropyl alcohol at 90% or higher evaporates quickly and doesn’t leave residue, which is why it’s specifically preferred over rubbing alcohol at lower concentrations that contain more water and evaporate more slowly.
Deep-Cleaning Individual Switches: When It’s Worth Doing
If a specific switch feels scratchy, sticky, or inconsistent compared to its neighbors even after a standard clean, that individual switch may need to be desoldered (on a soldered board) or pulled (on a hot-swappable board) for a more thorough interior clean, since dust and oil can work their way inside the switch housing itself over years of use. This is a more involved repair-level step rather than routine maintenance, and it’s really only worth doing for a small number of problem switches rather than as a standard part of every cleaning session — most keyboards never need this level of intervention if regular external cleaning is kept up.
Cleaning Gels: A Useful Middle-Ground Tool
A cleaning gel — a firm, putty-like substance that conforms to the keyboard’s shape as you press it into gaps between and around keys — is a genuinely effective lighter-maintenance tool for lifting dust and crumbs out of crevices without introducing any liquid at all. It won’t replace a full keycap-removal deep clean for genuinely grimy keyboards, but it’s a fast, low-effort way to handle surface-level dust buildup between full cleaning sessions, and it’s specifically useful for the narrow gaps around stabilizers and switch housings that a brush alone struggles to reach.
Compressed Air vs. Electric Dusters: Which to Use
Traditional canned compressed air carries a real risk that’s easy to overlook: tilting the can during use can release freezing liquid propellant rather than just air, which can damage sensitive electronics on contact and leave a residue behind. Electric dusters with brushless motors spinning above 100,000 RPM now match or exceed canned air’s cleaning force while offering unlimited use without recurring can purchases or the tilt-related propellant risk, making them a genuinely better long-term tool for anyone who cleans their keyboard and other electronics regularly rather than as a rare one-off task. A simple rubber squeeze bulb is a reasonable lower-cost alternative if you don’t want to invest in an electric duster, trading some airflow strength for zero cost beyond the initial purchase and no risk of propellant issues at all.
Cleaning the Case and Exterior
Once the switches and keycaps are handled, wipe down the keyboard’s case and any exposed frame with a microfiber cloth lightly dampened with water or a small amount of isopropyl alcohol, avoiding paper towels or rough cloths that can introduce fine scratches into matte or textured plastic finishes over repeated cleanings. For keyboards with RGB light bars or translucent case elements, a dry microfiber pass first to remove loose dust prevents grinding grit into the surface before introducing any dampness at all.
Reassembly: Getting Keycaps Back in the Right Spot
Once everything is fully dry, reassemble keycaps by pressing them firmly straight down onto their matching switch stems, referencing the photo you took in Step 2 to confirm correct placement, particularly for sculpted keycap sets where row height differs across the keyboard and an out-of-place cap will visibly sit at the wrong angle. Press down evenly across the keycap rather than at one corner to seat it fully onto the stem without bending it, and give the full board a quick test pass afterward, checking that every key registers correctly and stabilized keys like the spacebar don’t feel wobbly or rattle.
How Often Should You Actually Do This?
For a keyboard used daily in a typical home or office environment, a full deep clean every 6 to 12 months is a reasonable baseline, with lighter surface maintenance — a quick air-duster pass and a wipe-down — done more frequently in between as needed. Heavier use environments, like eating at your desk regularly or a genuinely dusty room, justify a shorter interval between deep cleans, while a keyboard that’s rarely used or kept in a clean, enclosed space can often go longer between full cleaning sessions without issue.
Cleaning Wireless and Low-Profile Keyboards: Extra Caution Needed
Wireless mechanical keyboards often pack their battery and internal electronics into a noticeably tighter case than wired boards, leaving less clearance around the PCB and making it even more important to keep liquid use minimal and confined to a barely-damp cotton swab rather than anything wetter. Low-profile mechanical keyboards present a similar challenge from a different angle — their shorter switches leave less room to maneuver a brush or swab between the stem and housing, so working slowly and avoiding excess pressure that could bend a shorter, more delicate stem matters more here than on a standard-height board. If your wireless keyboard has a removable battery, taking it out before cleaning adds a meaningful extra safety margin beyond simply powering the board off.
Common Mistakes When Cleaning a Mechanical Keyboard
- Cleaning a powered or plugged-in keyboard: always unplug or power off first — moisture or alcohol reaching a live PCB risks permanent damage.
- Pulling keycaps at an angle instead of straight up: this is the most common way to flex or crack a switch stem during removal.
- Reassembling keycaps before they’re fully dry: trapped moisture can work its way down into the switch itself — always allow a full air-dry period.
- Oversaturating a cotton swab with isopropyl alcohol: excess liquid can drip down into the switch housing — use a barely-damp swab instead.
- Tilting a canned-air duster during use: this can release freezing liquid propellant that damages electronics — an electric duster or squeeze bulb avoids this risk entirely.
- Skipping the layout photo on non-standard keycap sets: sculpted keycap profiles aren’t interchangeable between rows, making reassembly guesswork genuinely difficult without a reference photo.
Prices reflect typical listings as of early 2027 and can shift with promotions and availability — always verify current pricing before purchasing.
Frequently Asked Questions
Can I clean a mechanical keyboard without removing the keycaps?
You can do a lighter surface clean with an air duster and cleaning gel without removing keycaps, but a genuine deep clean of the switches and PCB area requires removing them.
What concentration of isopropyl alcohol should I use?
90% or higher. It evaporates quickly and doesn’t leave residue, unlike lower-concentration rubbing alcohol that contains more water and evaporates more slowly.
Is it safe to put mechanical keyboard keycaps in the dishwasher?
It’s not recommended — dishwasher heat and water pressure can warp keycaps or damage printed legends. Hand-washing in warm soapy water is the safer method.
How long should keycaps dry before reassembly?
Ideally overnight, air-drying completely on a clean towel. Trapped moisture inside a keycap cavity can eventually reach the switch if reassembled too soon.
Is canned compressed air safe for cleaning a keyboard?
It works, but tilting the can can release freezing liquid propellant that may damage electronics. An electric duster or squeeze bulb avoids this risk entirely.
How often should I deep clean my mechanical keyboard?
Every 6 to 12 months for typical daily use, with lighter maintenance in between. Dustier environments or eating at your desk regularly may justify shorter intervals.
What should I do if one specific switch feels scratchy after cleaning?
That individual switch may need to be desoldered or pulled (on hot-swappable boards) for a more thorough interior clean — this is a repair-level step rather than routine maintenance.
Do I need a keycap puller, or can I use my fingers?
A proper wire or plastic keycap puller significantly reduces the risk of damaging switch stems or scratching legends compared to prying with fingers or a flathead screwdriver.
For more on getting the most out of your keyboard, see our Best Mechanical Keyboard and Is a Mechanical Keyboard Worth It guides.
If you’re weighing this decision, it’s also worth reading Hot-Swappable Keyboards Explained: Should Your Next Board Be Hot-Swap?.
This pairs well with our guide, Best Gaming Keyboard Under $150 (2026).